
1. Getting started
The SX70 Bluetooth mini program lets you connect your SX70, set shooting parameters, use advanced controls, and update firmware.
1.1 Supported devices
- This manual applies only to SX70 devices with the Bluetooth name SX70_Mcu_K.
- It does not apply to the 636 and does not cover developer mode, the Bluetooth protocol, or debug logs.
1.2 Before you begin
- Install WeChat on your phone, sign in, and turn on Bluetooth.
- Turn on the SX70, ensure sufficient battery power, and keep it within Bluetooth range of your phone.
- On Android, also enable system location services and grant WeChat location permission.
Important: Before the first connection or an update, ensure both the camera and phone have sufficient battery power. Keep WeChat, the mini program, and the Bluetooth connection active during updates.
2. Bluetooth connection
Follow these steps for the first connection. After connecting, the mini program automatically opens the SX70 control page.
2.1 Connecting
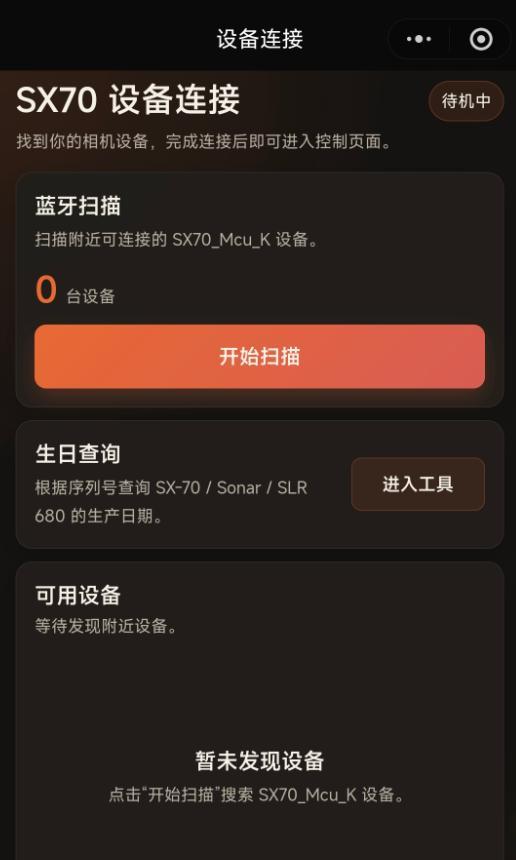
Step 1: Open the mini program and tap Start scanning (开始扫描) on the home page.
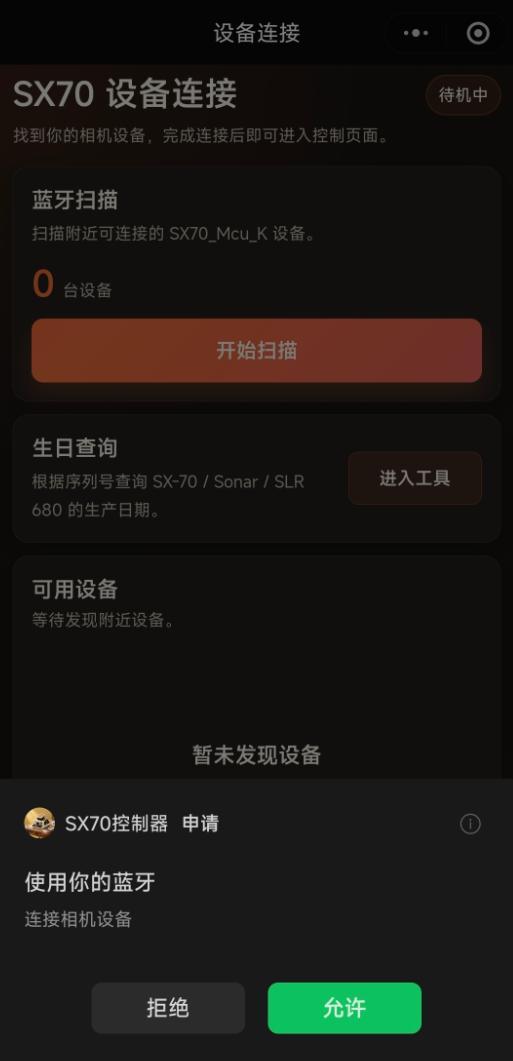
Step 2: On first use, allow WeChat to access Bluetooth when prompted.
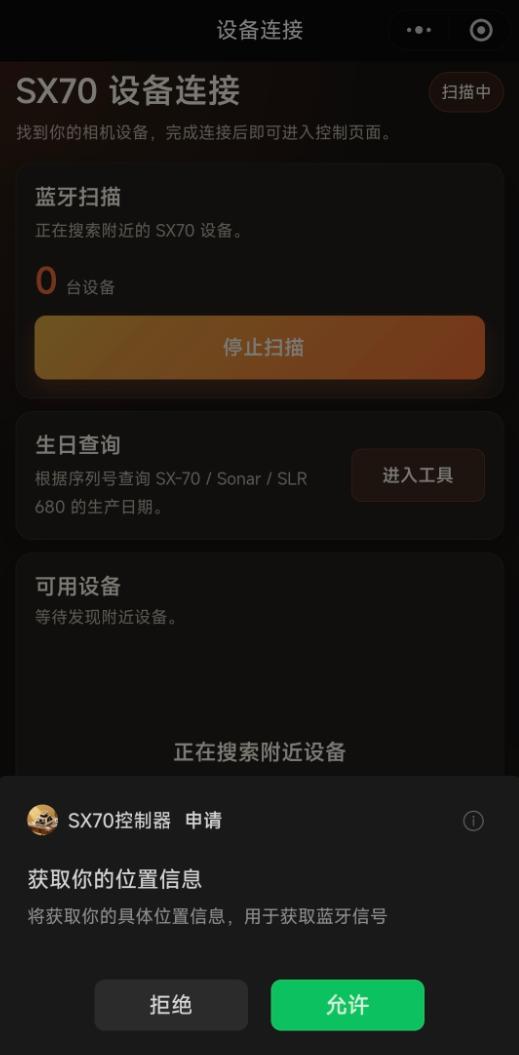
Step 3: On Android, grant location permission when prompted and make sure system location services are enabled.
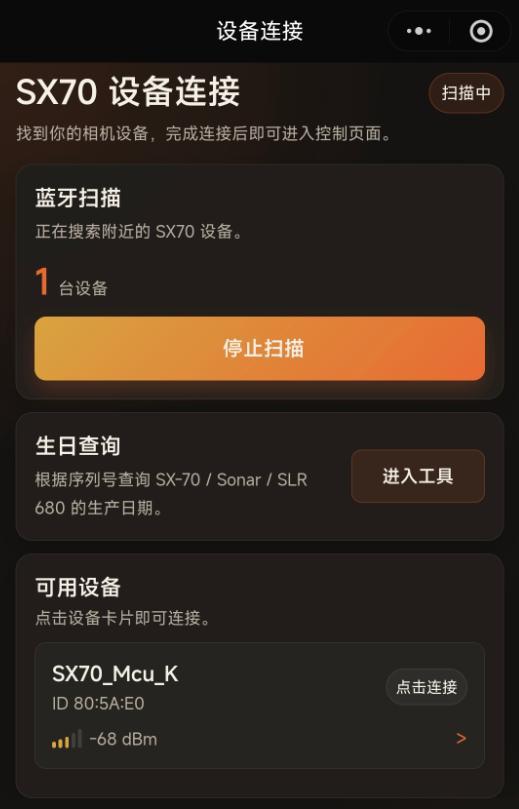
Step 4: Find SX70_Mcu_K in the available devices list and tap its device card to connect.
Step 5: Confirm that the control page shows Connected (已连接). If the connection drops unexpectedly, the mini program attempts to reconnect. If that fails, return to the home page and scan again.
2.2 Disconnecting
Select disconnect on the connected device card on the home page. To reconnect, scan again and select the device.
3. Basic camera controls
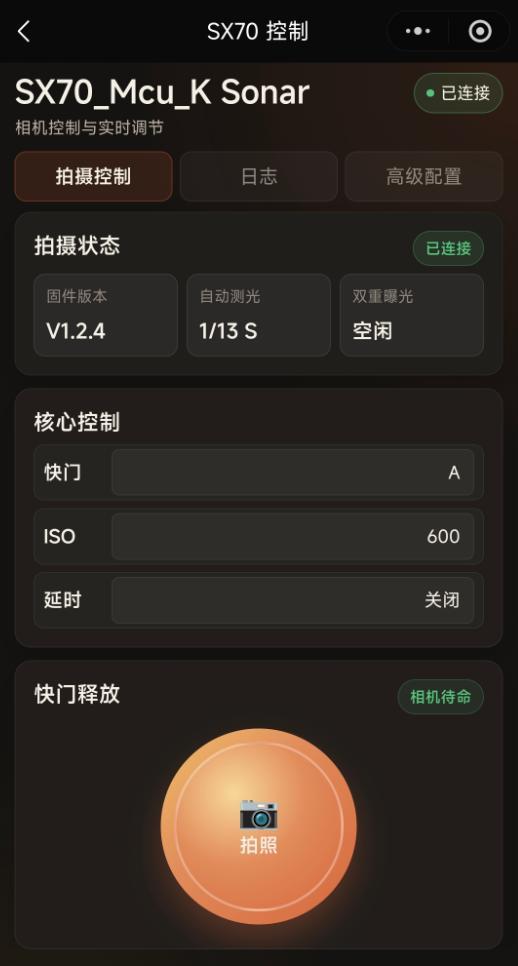
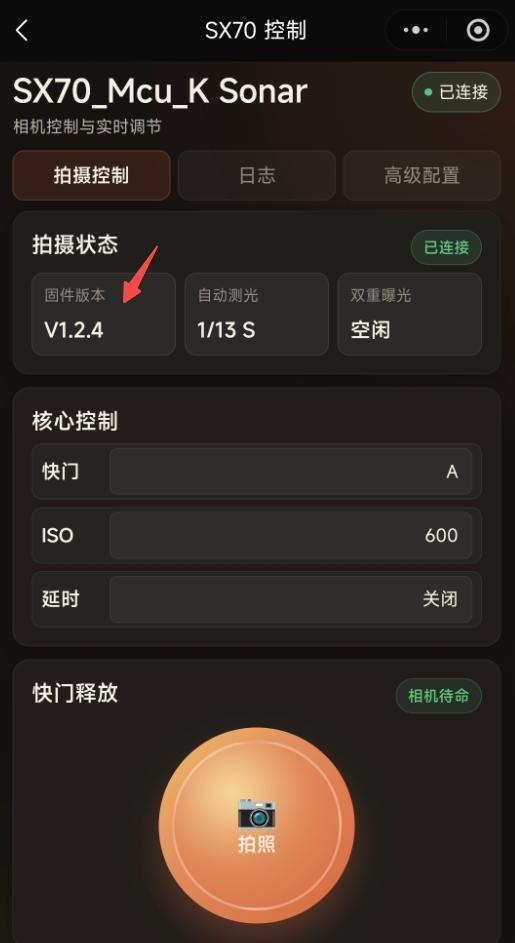
The control page opens on Shooting controls (拍摄控制) by default. Connection status, firmware version, and automatic metering information appear at the top.
3.1 Shutter, ISO, delay, and shooting
Step 1: Tap Shutter (快门) and select automatic, manual, or a fixed shutter speed.
| Shutter option | Operation and use |
|---|---|
| A | Automatic metering: the camera determines the exposure time. |
| T | Press once to open the shutter and again to close it, for manually timed long exposures. |
| B | Hold the shutter control to expose; release it to end the exposure. |
| Fixed speed | Choose from 1/8000 second to 25 seconds. |
Step 2: Tap ISO and choose ISO 100 or ISO 600.
Step 3: Tap Delay (延时) and turn it off or select the desired countdown duration.
Step 4: Confirm the shutter, ISO, and delay settings.
Step 5: Tap the round Shoot (拍照) button. With delay off, shooting starts immediately. With delay on, shooting starts automatically when the countdown ends.
Shooting tip: Do not tap Shoot repeatedly during the countdown. Keep the Bluetooth connection stable while the camera is shooting.
3.2 Shooting records
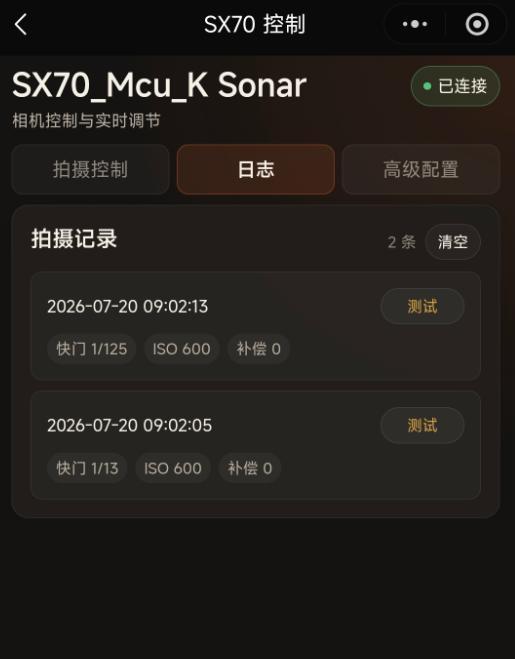
Open Logs (日志) to view shooting records from the current session. Tap Clear (清空) and confirm to delete the currently saved records.
4. Advanced functions
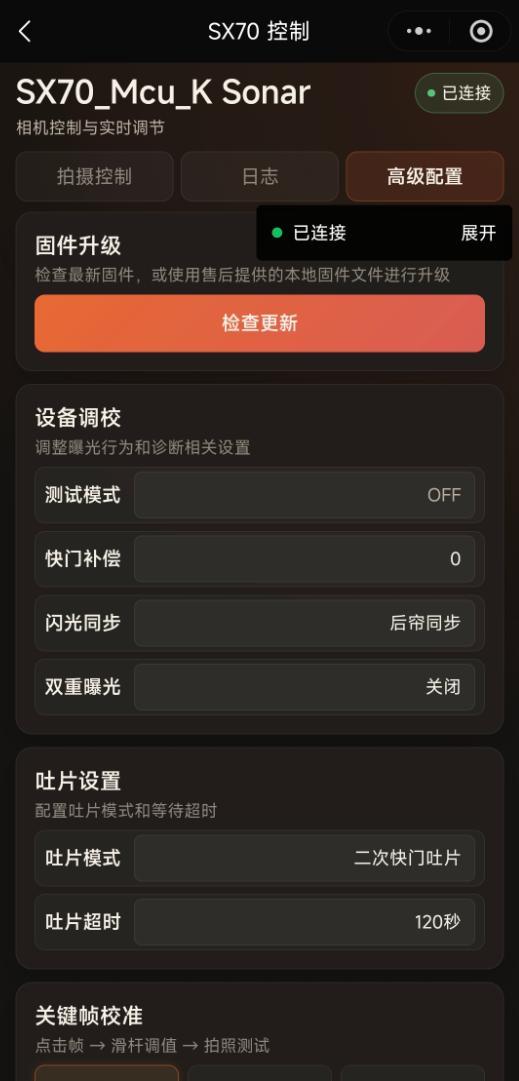
Open Advanced settings (高级配置) for camera adjustments, film ejection settings, and keyframe calibration. Some options appear only with supporting firmware.
Record the original values first: Advanced adjustments change camera behavior. Change one setting at a time in small increments. Restore the original value if the result is not as expected.
4.1 Test mode, shutter compensation, and keyframe calibration
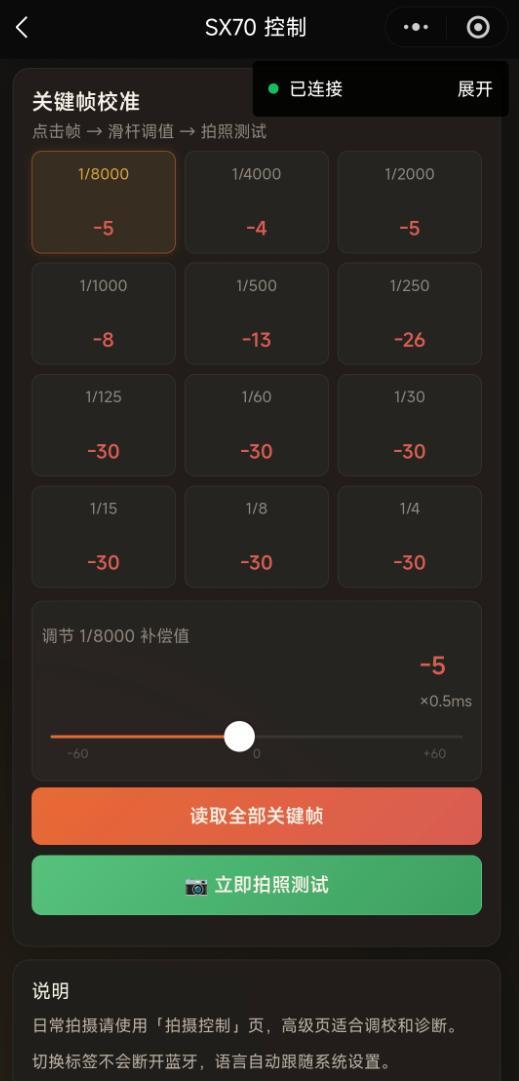
Aging shutter solenoids and other mechanical components can cause timing differences, leading to overexposure or underexposure. One set of parameters cannot suit every camera. Keyframe calibration is therefore provided for high shutter speeds to adjust shutter opening accuracy. The source manual describes calibration as theoretically able to improve results as long as the camera otherwise functions normally.
Set a fixed shutter speed in the mini program, such as 1/2000 second or 1/500 second, and record the shutter blades using your phone’s slow-motion mode at 240 fps or higher.
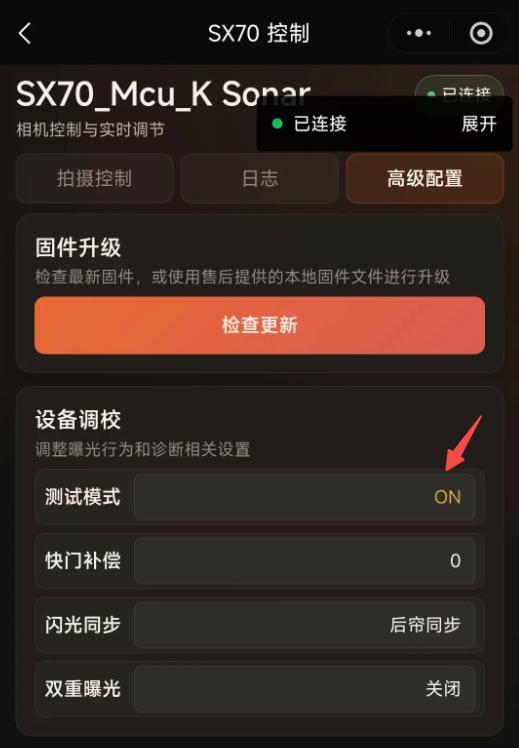
Step 1: Enable test mode. In Advanced settings, set Test mode (测试模式) to ON. The mirror will not rise; only the shutter blades move, making observation easier.
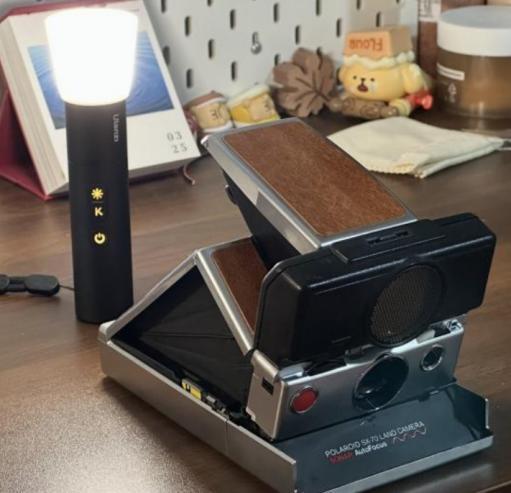
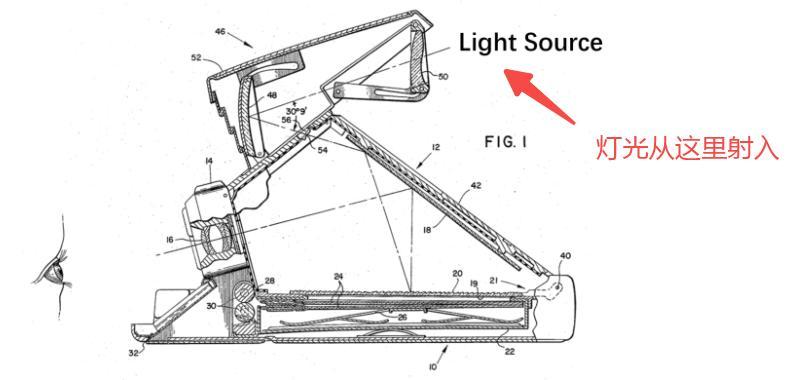
Step 2: Position the light. Turn on a light and direct it into the camera as shown in Figure 4-3. Observe the shutter from the front.
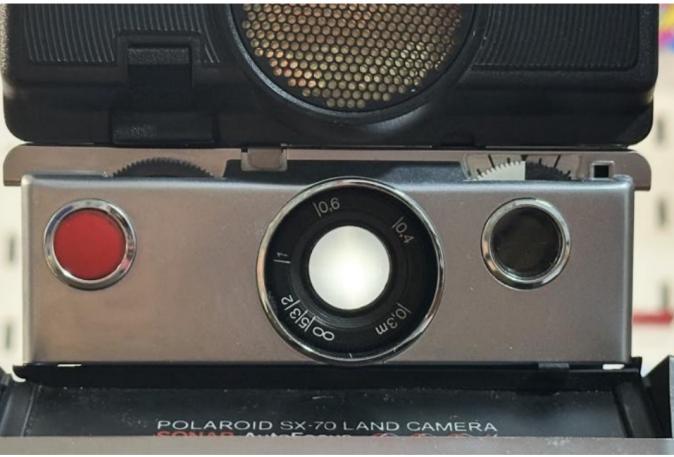
Step 3: Calibrate. Select manual mode, trigger the relevant shutter speed, and observe the opening.
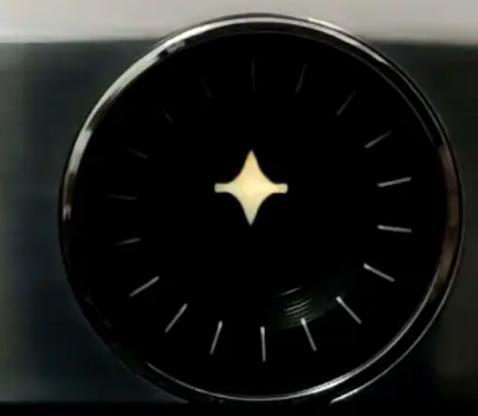
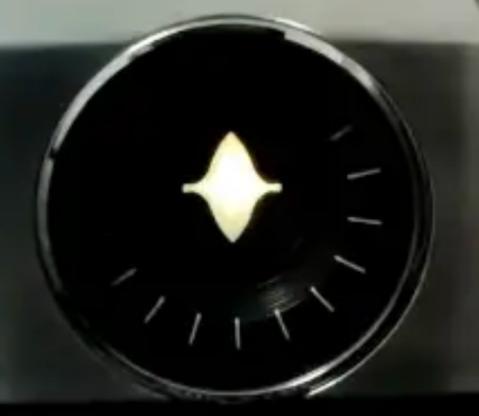
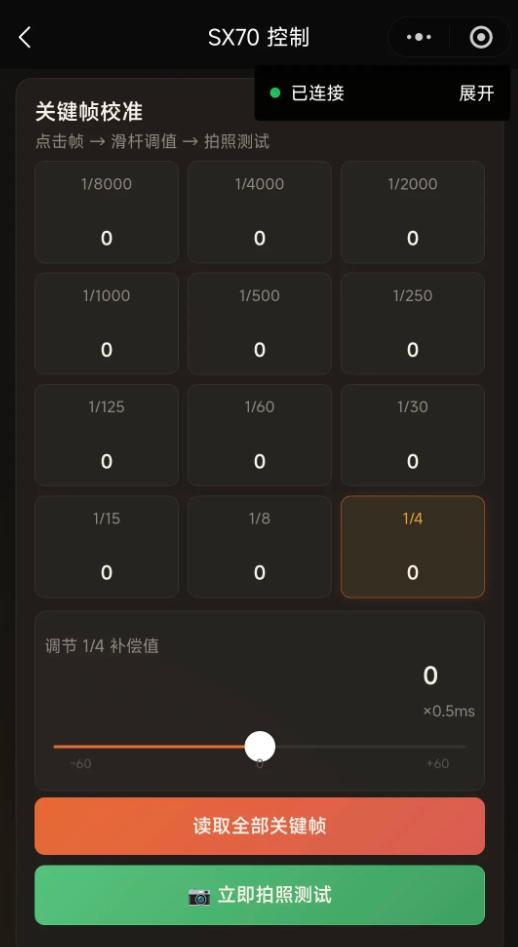
The two compensation controls have different scopes:
| Parameter | Scope | Range and step |
|---|---|---|
| Shutter compensation (快门补偿) | The entire shutter-speed range | -13 to +13, in steps of 1 unit |
| Keyframe calibration compensation (关键帧校准补偿) | The selected speed and neighboring 1/2-stop or 1/3-stop speeds | -60 to +60, in steps of 0.5 units |
For example, after setting compensation for 1/8000 second, compensation for 1/6400 and 1/5000 second is calculated linearly. Positive values increase time and allow a larger opening; negative values reduce time and produce a smaller opening.
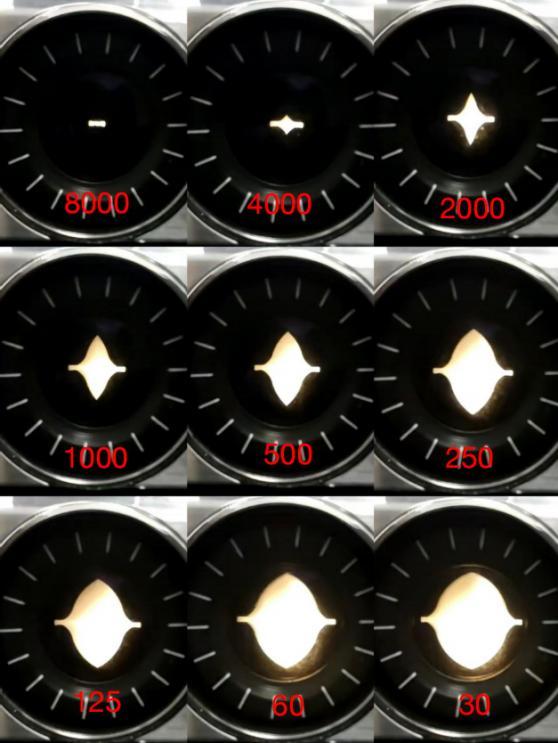
Start with 1/8000 second, then 1/4000 second, and work progressively toward slower speeds. Calibrate 1/8000 second using Shutter compensation, then calibrate subsequent speeds with their individual keyframe compensation controls. Figure 4-7 shows reference openings from 1/8000 to 1/30 second.
4.2 Flash sync and double exposure
- Front-curtain sync (前帘同步): Fires the flash at the beginning of the exposure, making the starting position of motion sharp.
- Rear-curtain sync (后帘同步): Fires just before the exposure ends, retaining the direction of motion trails.
- Double exposure (双重曝光): Enable it for repeated exposures as needed, and turn it off when finished.
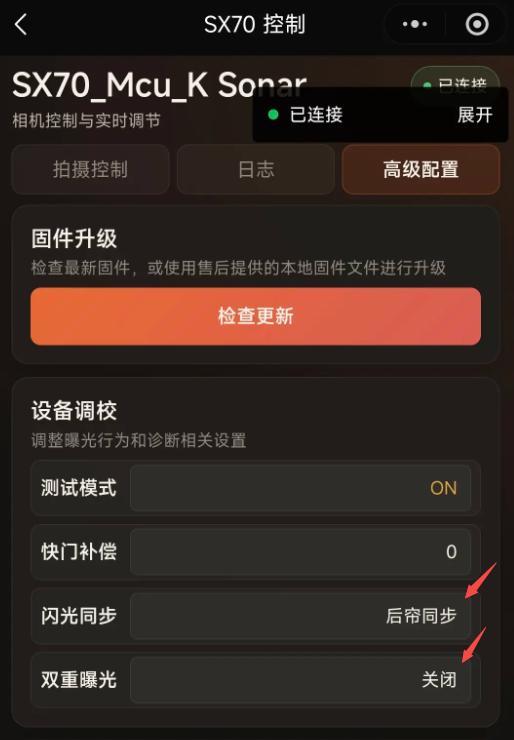
How double exposure works: Film is not ejected after the first exposure. The camera holds the film in place and waits for a second exposure. Only after the second exposure does the camera complete its normal finishing cycle and eject the film.
Use it for experimental combinations such as portraits over landscapes, silhouettes over lights, dark areas over bright areas, or flash with a slow shutter. Important limitations:
- The viewfinder cannot be used for the second exposure. After the first exposure, the mirror stays in a special position rather than returning to its normal viewing state. Compose the second image in advance or aim based on experience.
- Use manual mode for the second exposure; the program also enforces a mode restriction. If automatic mode is still selected while waiting for the second exposure, a prompt asks you to switch to manual. The second exposure does not follow the full automatic metering and viewing sequence, so manual shutter timing is more controllable.
- Dark backgrounds, night scenes, flash, and portrait silhouettes work better. Two bright images can easily overexpose the film. Try a dark outline first, then lights or textures.
- The double-exposure setting is saved. Once enabled in the mini program, the camera remembers it; you do not need to configure it each time.
This is not a fully automatic double-exposure mode. It is a controlled creative process: establish a base image, manually overlay the second exposure, then eject the film.
4.3 Film ejection
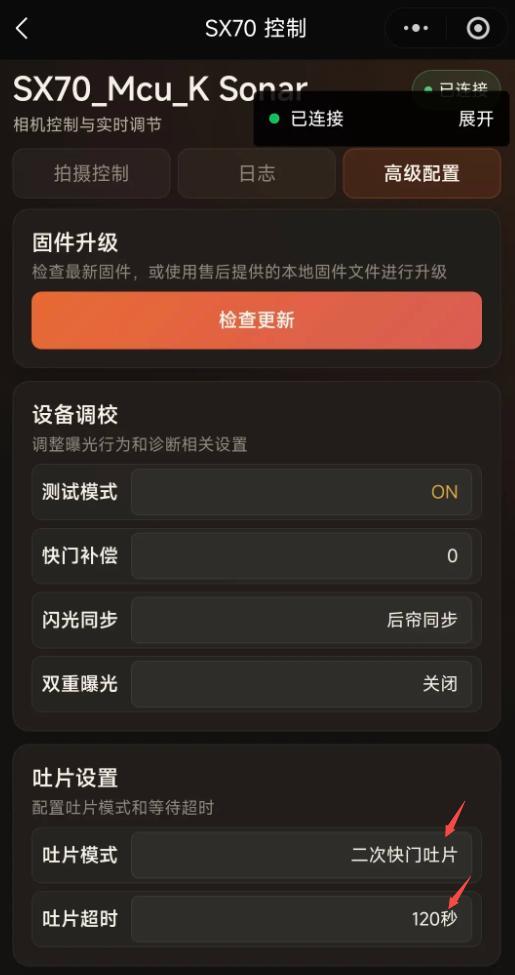
- Automatic ejection (自动吐片): The camera ejects film automatically after shooting.
- Second-press ejection (二次快门吐片): Operate the shutter again after the exposure to eject the film.
- Ejection timeout (吐片超时): Adjustable only when shown on the page. Choose according to your shooting workflow.
5. Firmware updates
Firmware updates currently support local updates only. Connect the SX70, open the last tab, Advanced settings (高级配置), and use the Firmware update (固件升级) entry at the top.
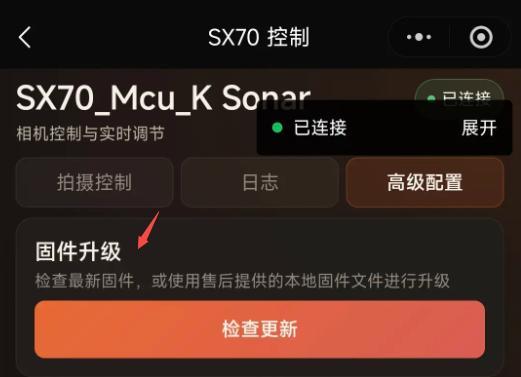
Compatibility with the old entry: If you used the older workflow, tap Firmware version (固件版本) on the Shooting controls page 5 times. A message explains that the entry has moved. Tap Go to Advanced settings (前往高级配置) to open it.
Do not interrupt an update: Ensure the phone and camera have sufficient power beforehand. During the update, do not turn off Bluetooth, exit WeChat, move away from the device, operate the camera, or interrupt progress.
5.1 Online updates
Online updates are not available yet. This version does not support checking for, downloading, or installing firmware online. Do not obtain firmware from web searches or unofficial sources.
5.2 Local updates
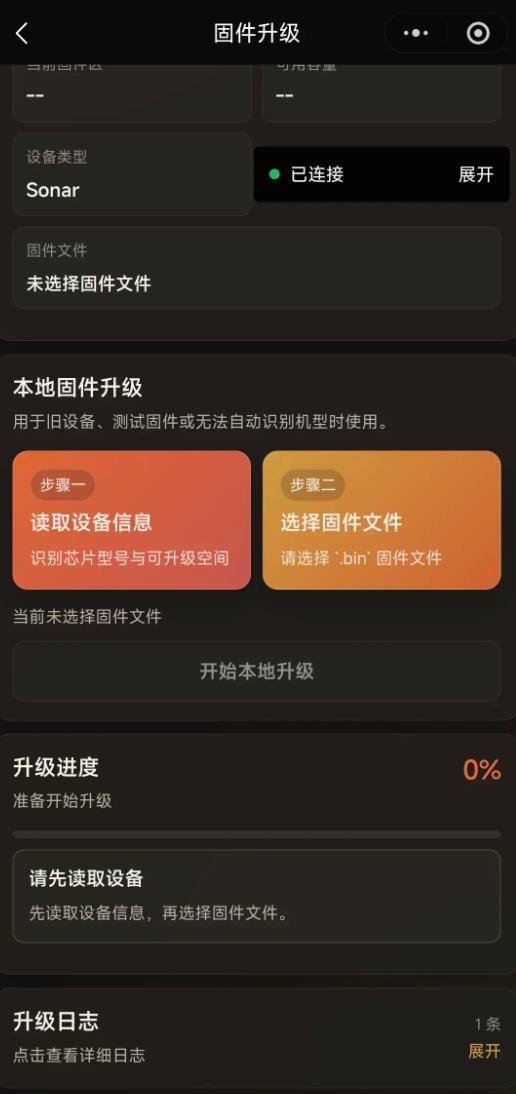
- Open Firmware update. Tap Read device information (读取设备信息), then Select firmware file (选择固件文件). Select the new firmware file from your chat history; contact the manufacturer to obtain it.
- Tap Start local update (开始本地升级). When update progress reaches 100%, the update is reported successful. Do not leave the page during the update.
- Wait for the device to restart, then reconnect. Confirm that the new firmware version matches the update filename. If the update fails or is interrupted, preserve the update logs, do not repeatedly flash the device, and contact support.
6. Troubleshooting
| Problem | Possible cause | What to do |
|---|---|---|
| Device not found | Camera off, Bluetooth off, Android location disabled, or too far away. | Turn on the camera and phone Bluetooth. On Android, enable location services and permission. Move closer and scan again. |
| Connection fails or drops | Unstable signal or an abnormal camera/phone Bluetooth state. | Move closer, turn phone Bluetooth off and on, then return to the home page to scan and reconnect. |
| Camera does not respond | Disconnected, or still performing the previous operation. | Confirm the page shows Connected (已连接), then wait for the current operation to finish before retrying. |
| Advanced function missing | Camera firmware does not support the function. | Follow what is actually shown on the page. Contact support for firmware upgrade advice. |
| Local update will not start or is interrupted | Low power, incompatible firmware, lost Bluetooth connection, or an interrupted operation. | Use the matching .bin file supplied by support. Preserve logs and contact support; do not repeatedly flash the device. |
When contacting support, provide the mini program version, camera firmware version, phone model and OS version, time of the issue, and update logs or relevant screenshots.